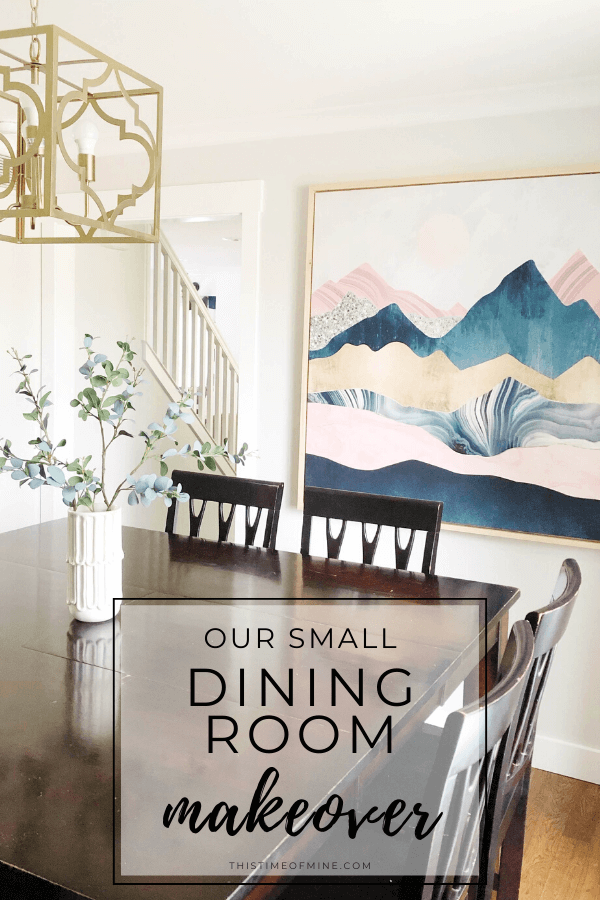
Our Small Dining Room Makeover: Little Changes With Big Results


A small dining room doesn’t have to feel small! Find out how this formal dining room went from dark and outdated to bright and modern with just a few simple changes.
Have you ever felt a space in your home is too small to do what you want with it?
That’s certainly how I felt about this small dining room when we first moved in!
But I’m a sucker for finding ways to make small spaces feel bigger. So today, I want to share how a few little updates made a huge difference in this space.
And here’s the best part: it was simple and inexpensive!
The most expensive thing we did was replace the window (which we did ourselves, so it wasn’t really that pricey). But luckily, most people don’t have to worry about that when redoing a space!
So if you have a small dining room too, hopefully you can get an idea or two to help you out!
What we started with
This is what the room looked like when I saw it for the first time, staged by the previous owners.
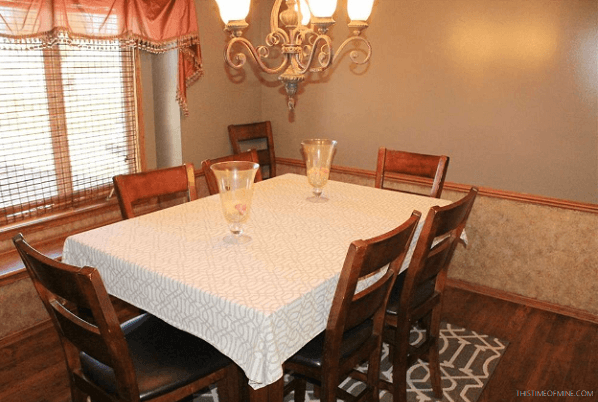
Besides being a little outdated, the room seemed so small because:
- The chair rail split the wall in a way that made the ceiling feel low
- The popcorn ceiling soaked up any light and also made the ceiling feel low
- The window treatments were too dark
- The chandelier was too big (and heavy) for such a small room
- The paint was too dark for the amount of light the room got
Side note: The whole house started out like this. It was brown, inside and out. If you’re like me and love before and afters, here are some of our other projects.
And even though it was similar in size to the dining area in our last house, it just felt SO cramped! But once we stuck our table in there and saw that everything could fit, we were determined to find a way to make it feel bigger by tackling those issues.
This post contains affiliate links. For more information, see my disclosures here.
First task: the ceiling

I think sitting down and eating as a family is extremely important. But even when I’d try and make things fun, I still felt like we were eating in a dungeon (a real mood killer).
Also, we have a high table. So the gigantic light was the first to go. (It hung just inches above our table!)

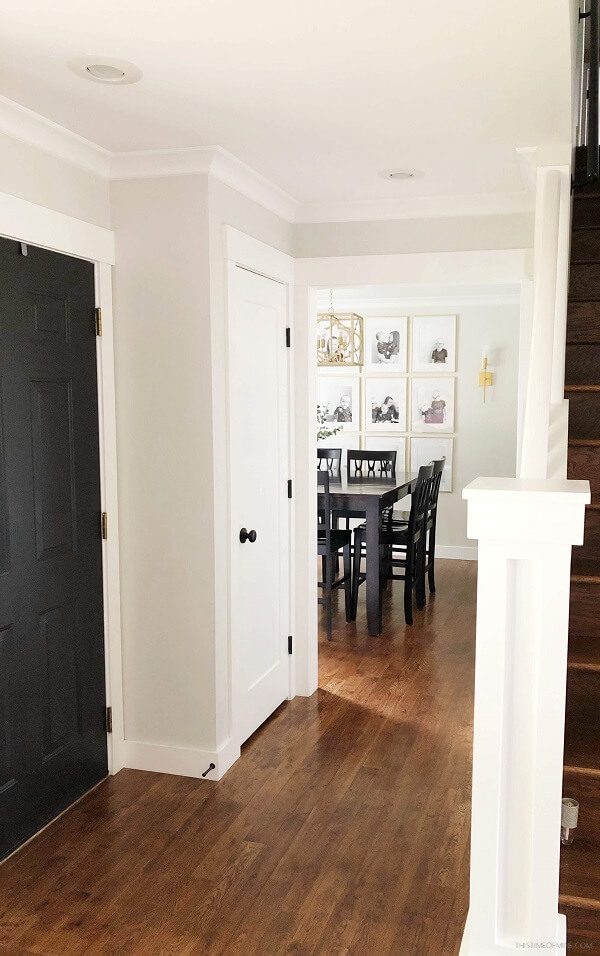
Then it was time to dive into scraping the popcorn ceiling.
If you’ve ever wondered about removing your popcorn ceiling (and you’re not worried about asbestos), I’m here to tell you, you can do it!
It’s easy, costs almost nothing and 10000% worth the mess (yes, it’s messy). I go into a little more detail about scraping popcorn ceiling in our hallway makeover post, but just trust me when I say it’s not hard!
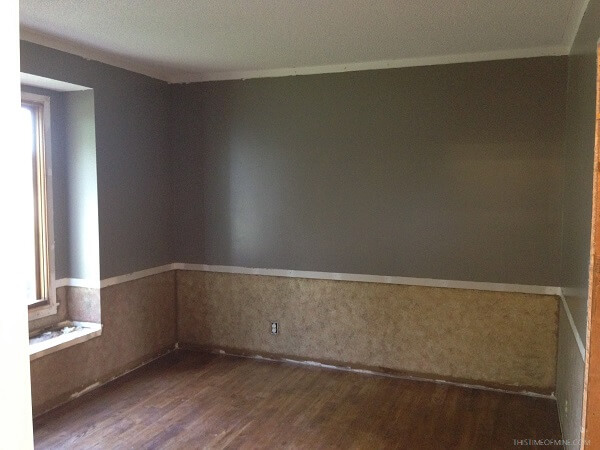
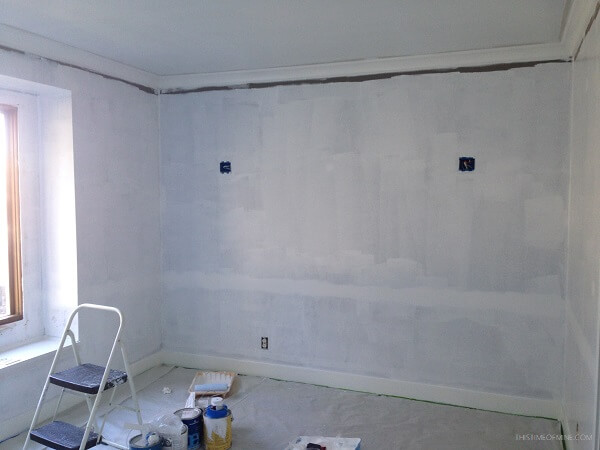
Second task: prepping the walls
This next part mostly just applied to our specific dining room, but here’s what we did.
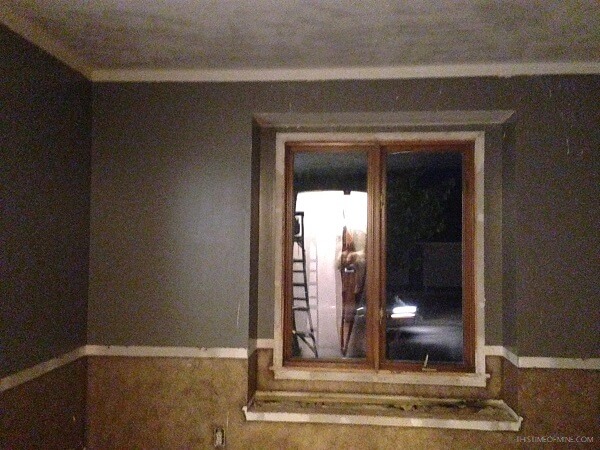
First, we had to take care of the window area.

The wood window was rotted, so we replaced it with a fiberglass window (which we’ve been doing throughout our house).
And the window seat got a new piece of MDF. To make it look finished, a thin trim piece was added around the edges. And a 3-inch trim piece was added to the front.
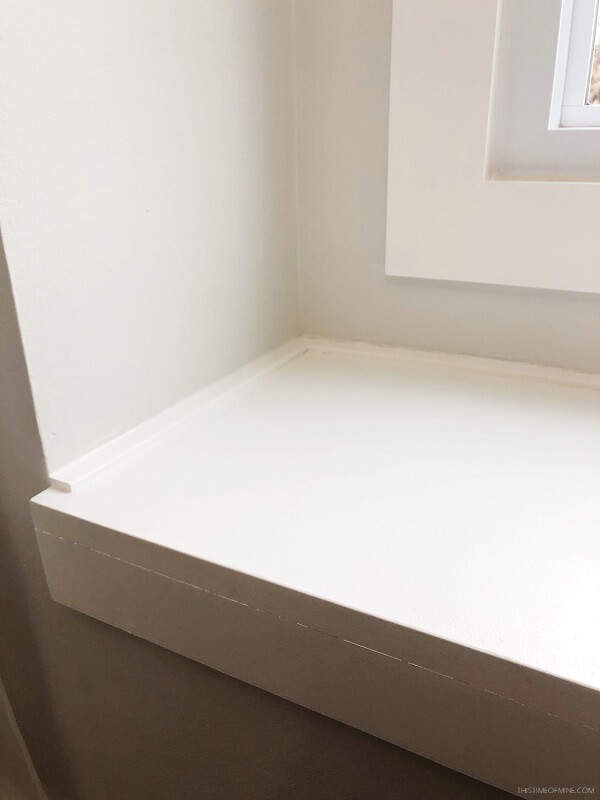
(This was taken before I finished filling, sanding and painting it completely.)
The next step was to smooth out the line on the wall after we removed the chair railing.
To do this, we added drywall mud and sanded it after it dried. It took more than one pass in a couple spots, but the finished result was nice and smooth!
The last things we did to prep the walls were:
- Fill in any dings with spackling
- Add crown molding (less than $50)
- New trim along the floor (around $35)
- New door and window casings (only because we were replacing them throughout the house)
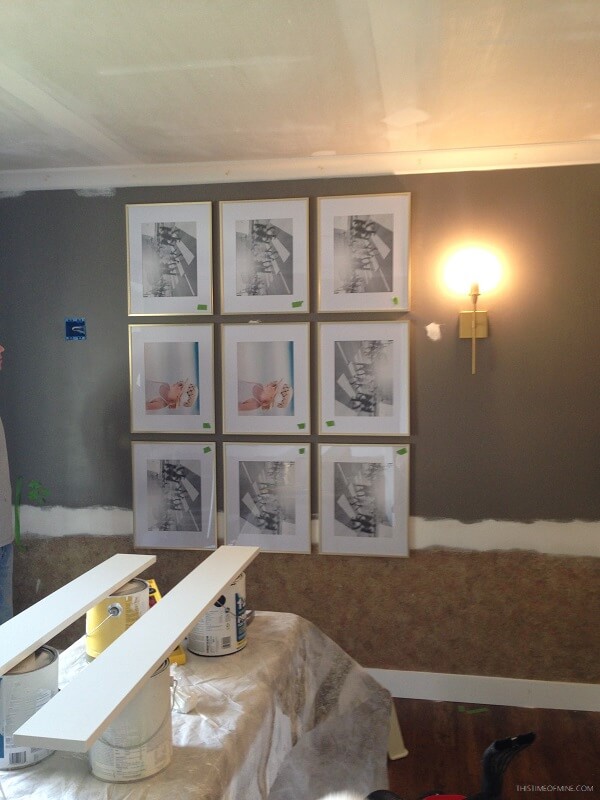
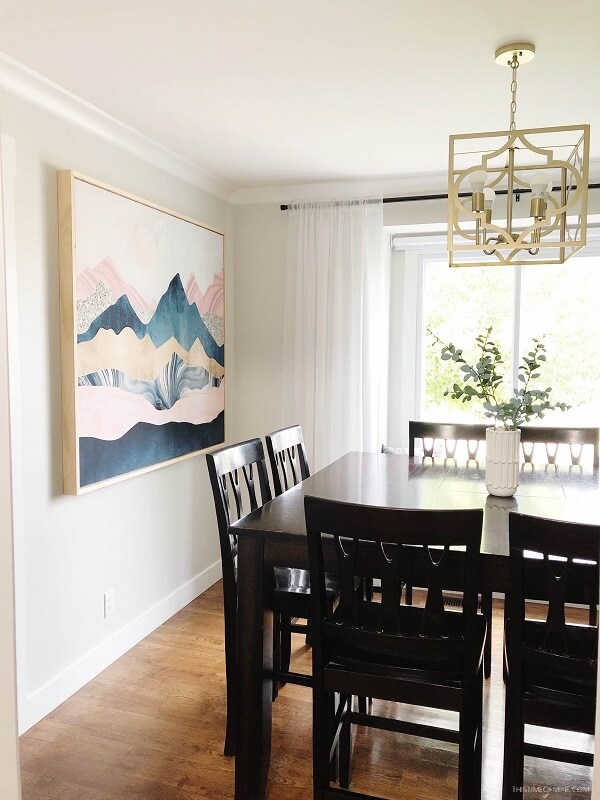
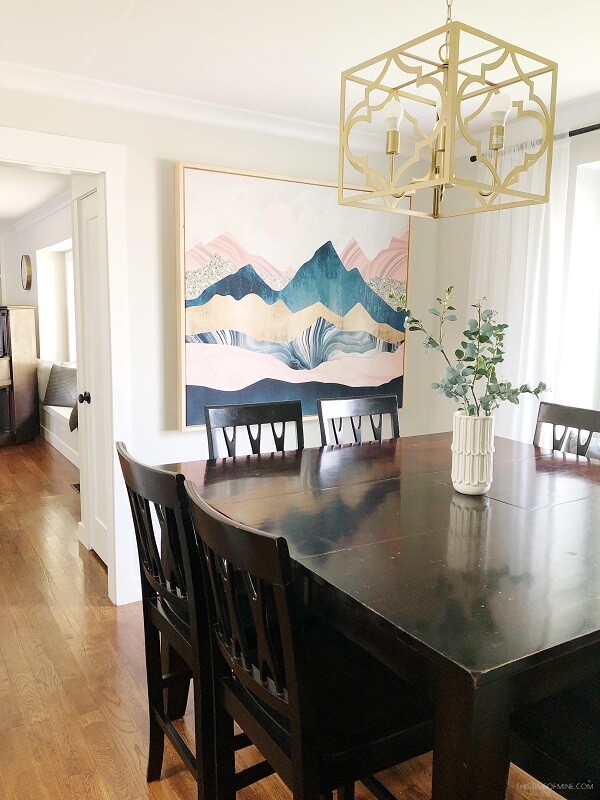
Thinking ahead, I knew I wanted an accent wall. (I decided to go with a gallery wall like this beautiful one from Making Home Base.) I also wanted more lighting.
So before painting, we figured out the spacing for these 11×14 frames and installed these sconces. (See the note at the bottom of this post.)
Third task: Paint and decorate!
Prep work is no fun. It takes forever! But it’s totally necessary.
And at least it makes the painting part feel so fast in comparison!
We grabbed our favorite supplies and painted the ceiling and the walls. And I LOVED seeing the room lighten up!
Here are some side-by-sides to see the difference paint makes!
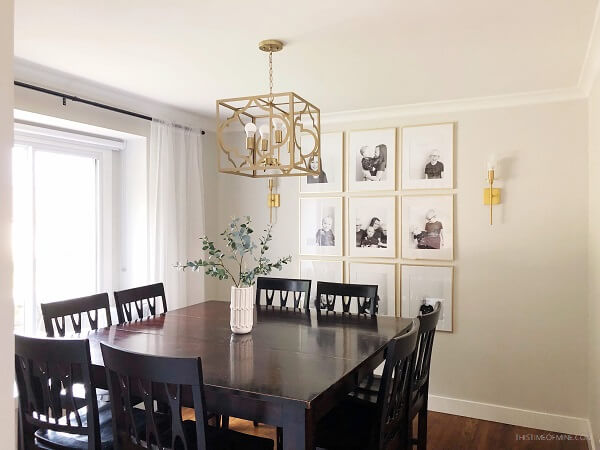
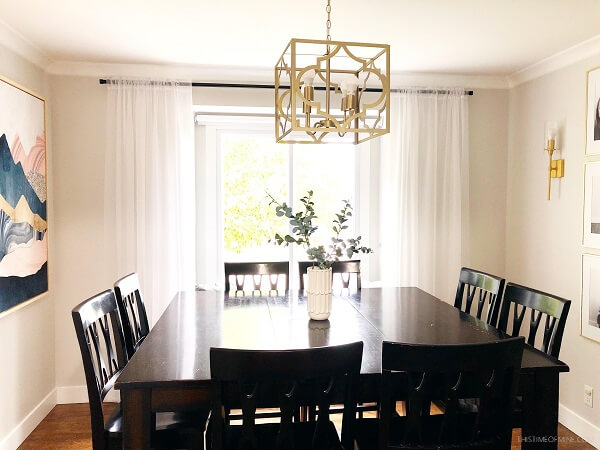


Much better! It’s still a small dining room, at just over 10 feet X 11 feet. But I have to say, it sure feels a lot bigger than it did when we first bought it!

RELATED: A DIY Stair Makeover: Tutorial And Tips

RELATED: How To Make And Frame Your Own Large Art For Cheap!


RELATED: Our Living Room Remodel: Before And After
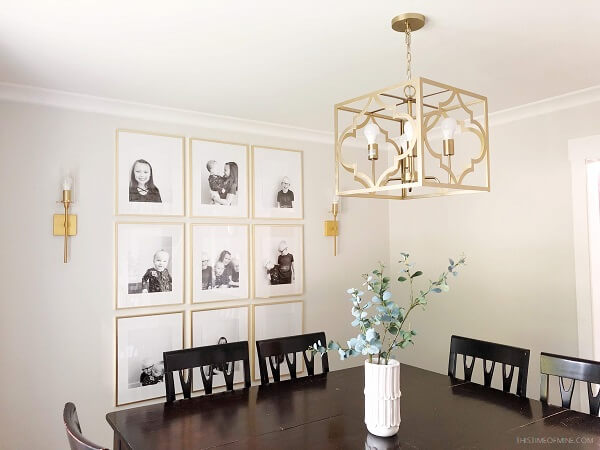
A note about the lighting
One thing I love about the sconces I chose is that they have a square base.
But my original plan was to have a giant circular mirror between them. (I didn’t want it to be too “matchy-matchy” with a circular mirror and circular sconces.)
Well, then I couldn’t find a mirror in the right size for less than $500 – which totally wasn’t in the budget. So I decided to go with the grid gallery wall.
I originally planned on changing out the sconces, but haven’t gotten to that yet. (Life with kids)
Well, now I’m stuck with a design fail. I have square sconces, square frames, a square chandelier AND a square table. And they’re all gold!
So much for avoiding “matchy-matchy”!
But that’s the beauty of decorating. It can change! For now, I love my picture frames. So those are staying. I guess that means the lighting will have to change. I just haven’t decided on anything yet.
One more thing about the sconces.
I would totally choose them again in a different space. I love them! But I don’t like the finish. It’s too orange.
I would spray them with this spray paint. It’s the best gold spray paint out there!
Sources
- Ceiling paint: Benjamin Moore Chantilly Lace
- Wall paint: Benjamin Moore Gray Ow, lightened 50%
- Trim paint: Benjamin Moore Chantilly Lace
- Wall art: DIY
- Gold frames
- Sconces
- Curtains
- Curtain Rod
- Eucalyptus stems
- Vase: Target clearance
- Chandelier, Table and Chairs: Nebraska Furniture Mart
So there you have it. Thanks for checking out our small dining room makeover!
want to remember this?
PIN IT TO YOUR FAVORITE BOARD
Share this article: