How To Make And Frame Your Own Large Art For Cheap!


It doesn’t have to cost a ton to decorate your walls. Check out this tutorial to see how you too can create a large and inexpensive piece of art!
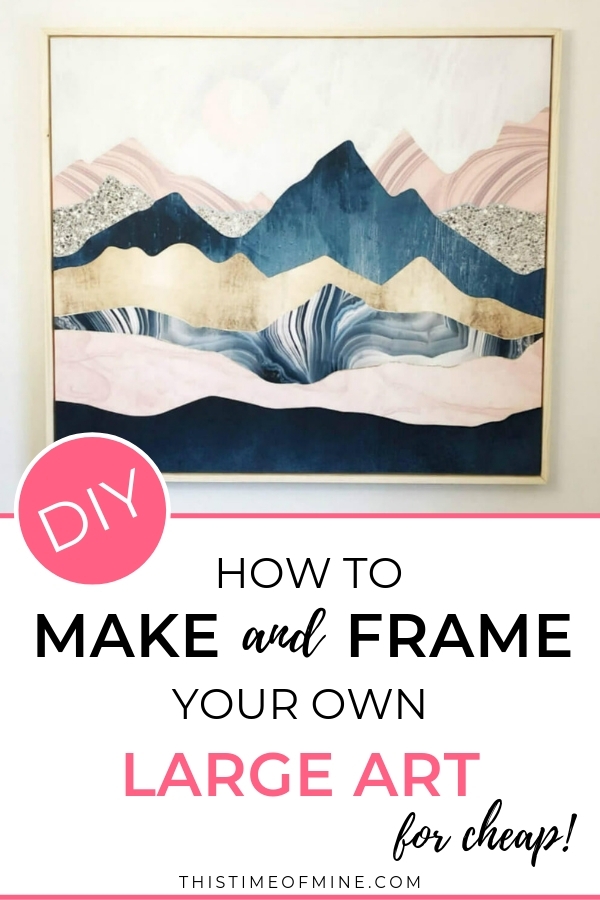
Adding art to your home can dress up and personalize your space. But large art can come with a hefty price tag. So why not make something yourself?
I was able to make this canvas with a floating frame all for less than $65! And all I needed was a little bit of wood and a wall tapestry!
I knew I wanted a large piece of art for my dining room. But the price just wasn’t in the budget.
At first, I thought I might DIY an abstract canvas painting. But I was afraid it might not turn out. (*perfectionist issues*)
So when I came across this idea by Angela Rose Home, I couldn’t resist giving it a try! (Follow her Instagram account for lots of DIY inspiration. She’s a creative genius!)
I love the way mine turned out and couldn’t wait to share a tutorial so you can try it too!

First, you’ll need to find a wall tapestry you love. I found mine at Society6, size small. You could also use a shower curtain or fabric.
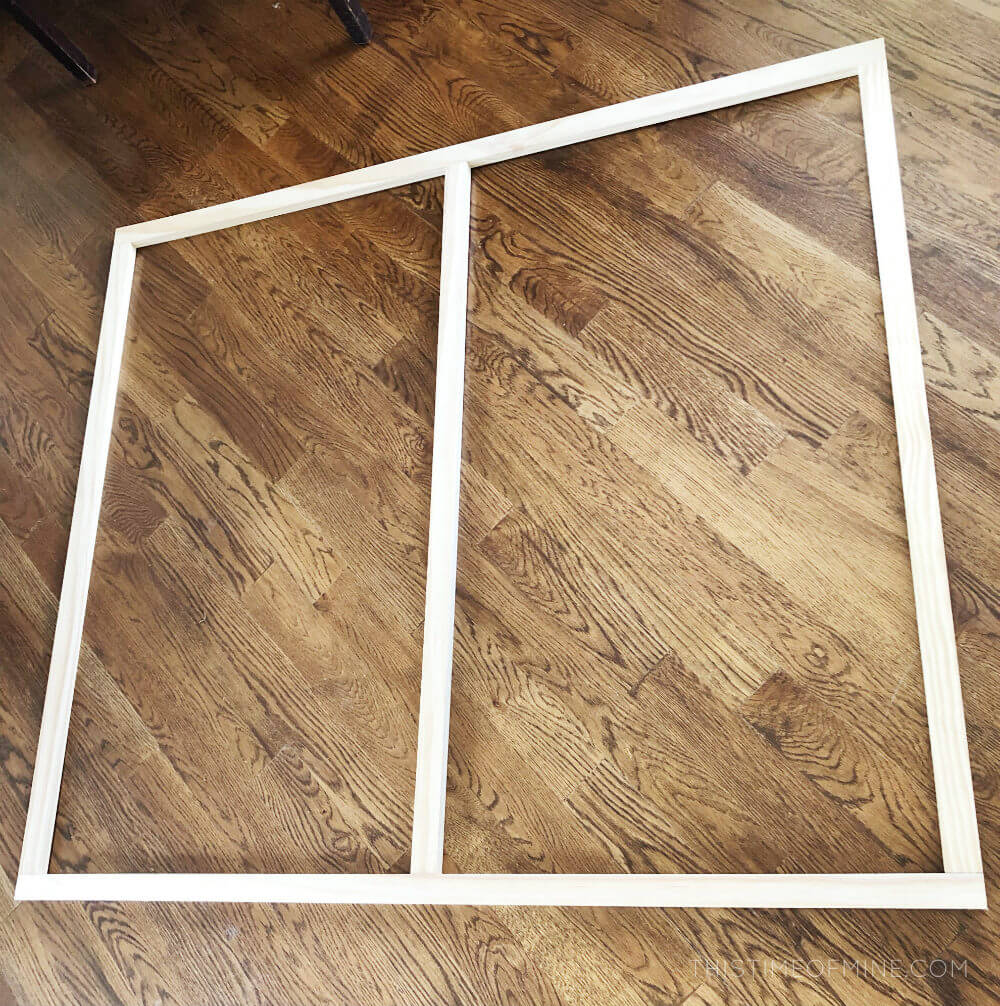
Next, gather your materials and find an open space to work. You will build an inside frame first, and then finish with the floating frame.
Let’s get started! Here are the materials you will need:
INSIDE FRAME
- 5 1×2 pine boards
- White twin flat sheet (if your fabric is sheer)
- Wall tapestry (mine is 51×60 in.)
- Staple gun
FLOATING FRAME
- 4 1×2 pine boards
- 4 1×3 pine boards
- Nail gun and finishing nails
- Wood glue
- Clamps
Here are a few of examples of the tapestries at Society6. They’re amazing quality!

Instructions for the inside frame:
STEP 1: CUT YOUR MATERIALS
Cut the 1×2 boards:
- Top and bottom: 3 inches shorter than the length of your fabric
- Middle support and 2 sides: 5 inches shorter than the height of your fabric
Cut the twin sheet to match the size of your fabric.
Lay your boards on top of your fabric to make sure you will have enough room to wrap and staple.
STEP 2: ASSEMBLE THE FRAME
Pre-drill your holes. Use 2 inch screws at the joints to secure your frame
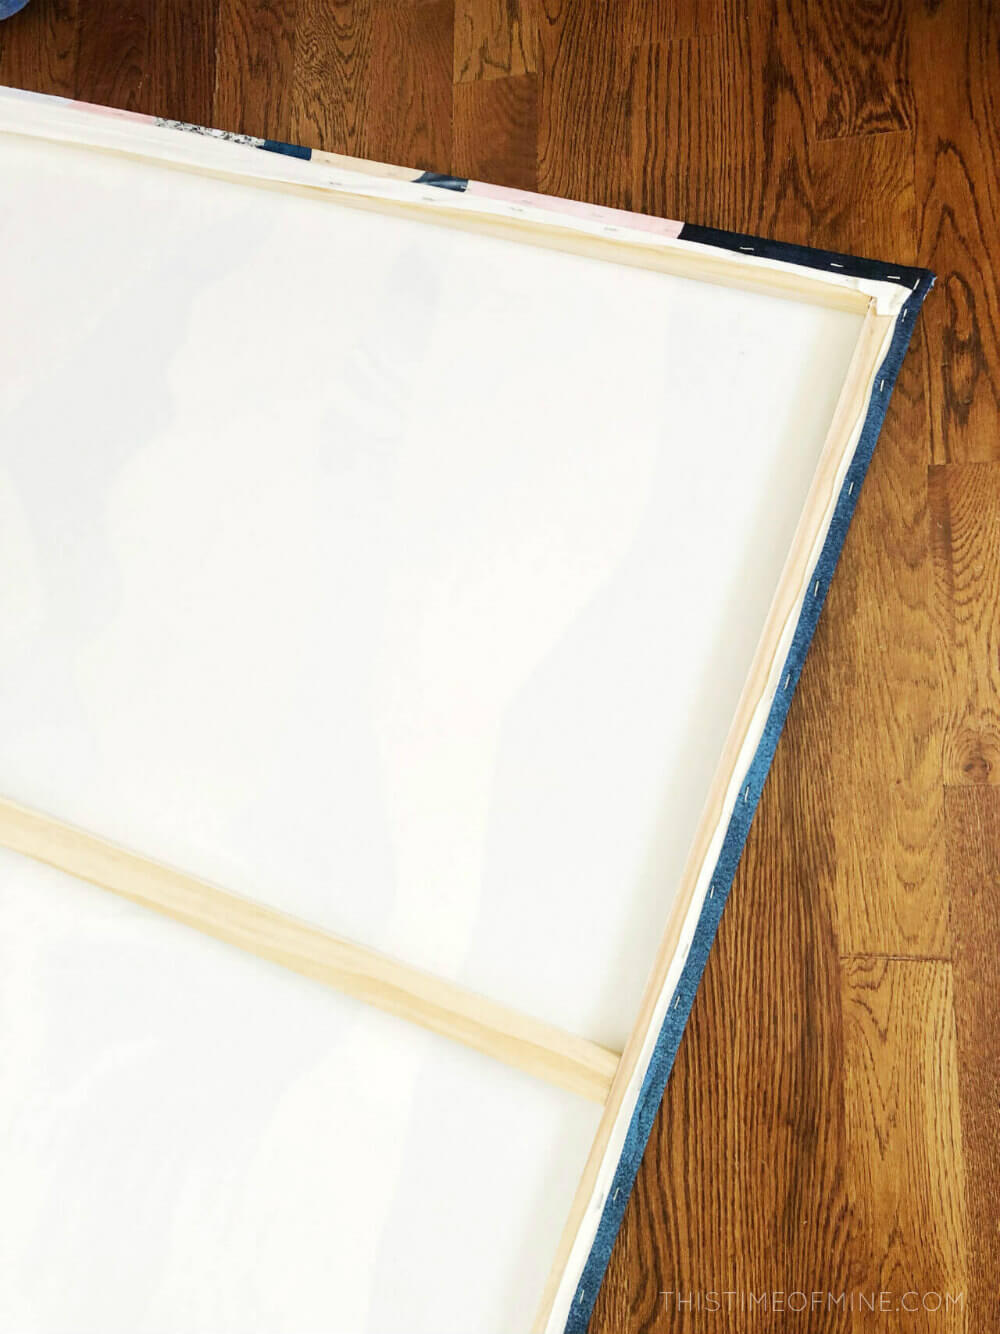
STEP 3: STAPLE YOUR FABRIC
Lay the twin sheet on a flat surface and place your frame on top.
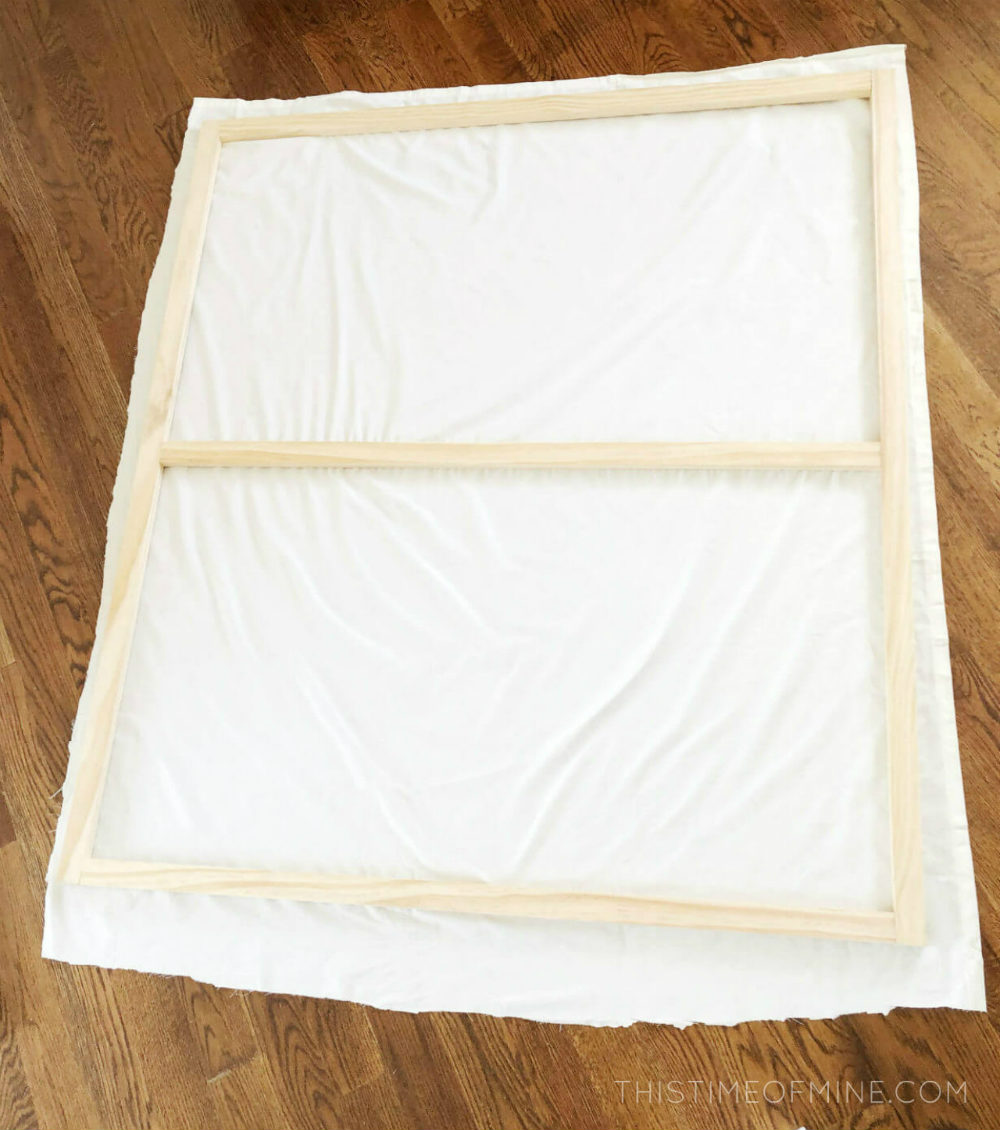
Starting at the bottom of the frame in the middle, wrap your sheet over the frame tightly and staple in place.
Work your way to one edge, stapling approximately every 6 inches. Then, work your way from the middle to the other edge.
Repeat with the top of the frame. Then repeat with each side.
Cut off any excess fabric.
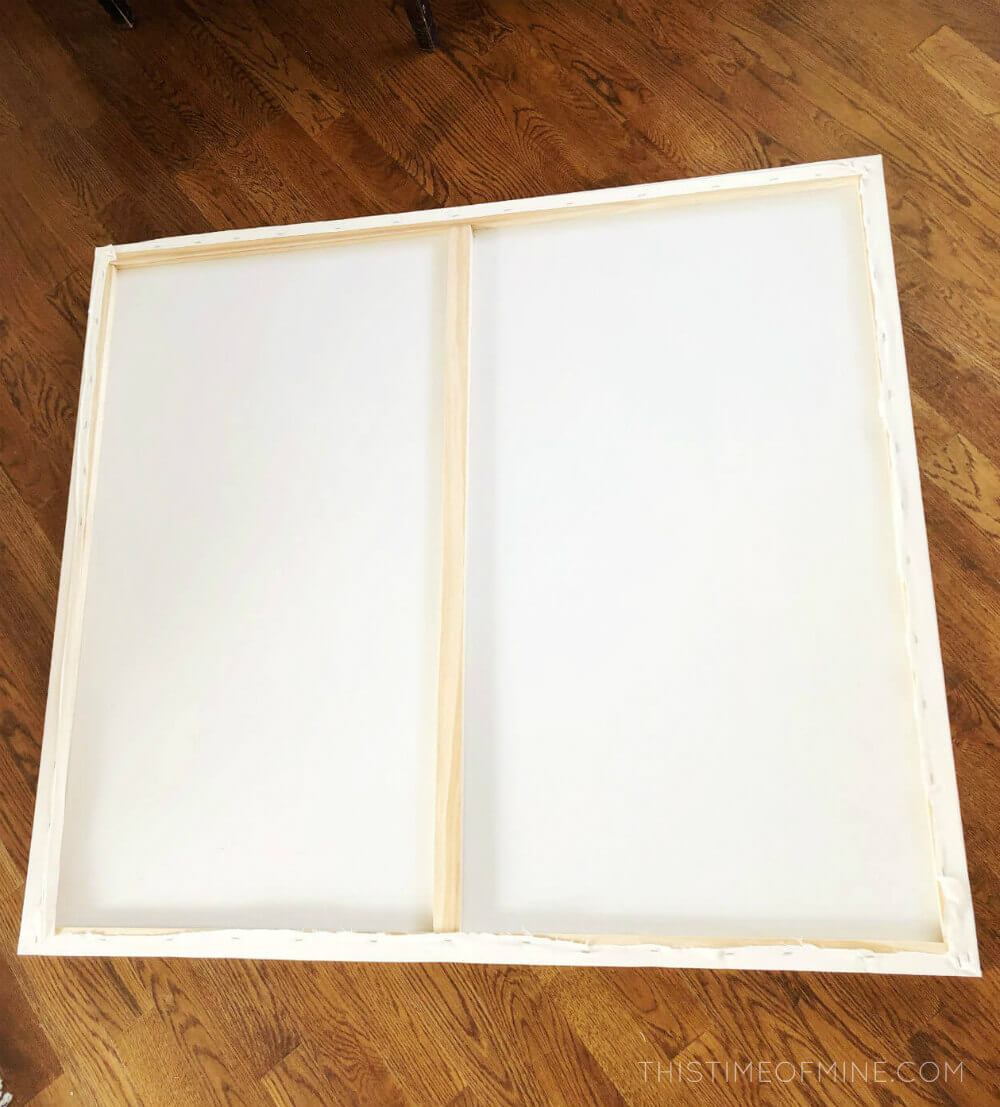
Now lay your tapestry upside-down and repeat the process.

Good job! Now it’s time to build the floating frame.
STEP 4: BUILD A SECOND FRAME
In order to make the frame appear like it is floating, we have to build a second from for it to attach to.
Cut the top and bottom 1×2 a ½ inch longer than the inside frame.
Cut the sides a ½ inch longer as well. This extra length will allow the final frame to “float”. (There is no need for a middle brace on this frame.)
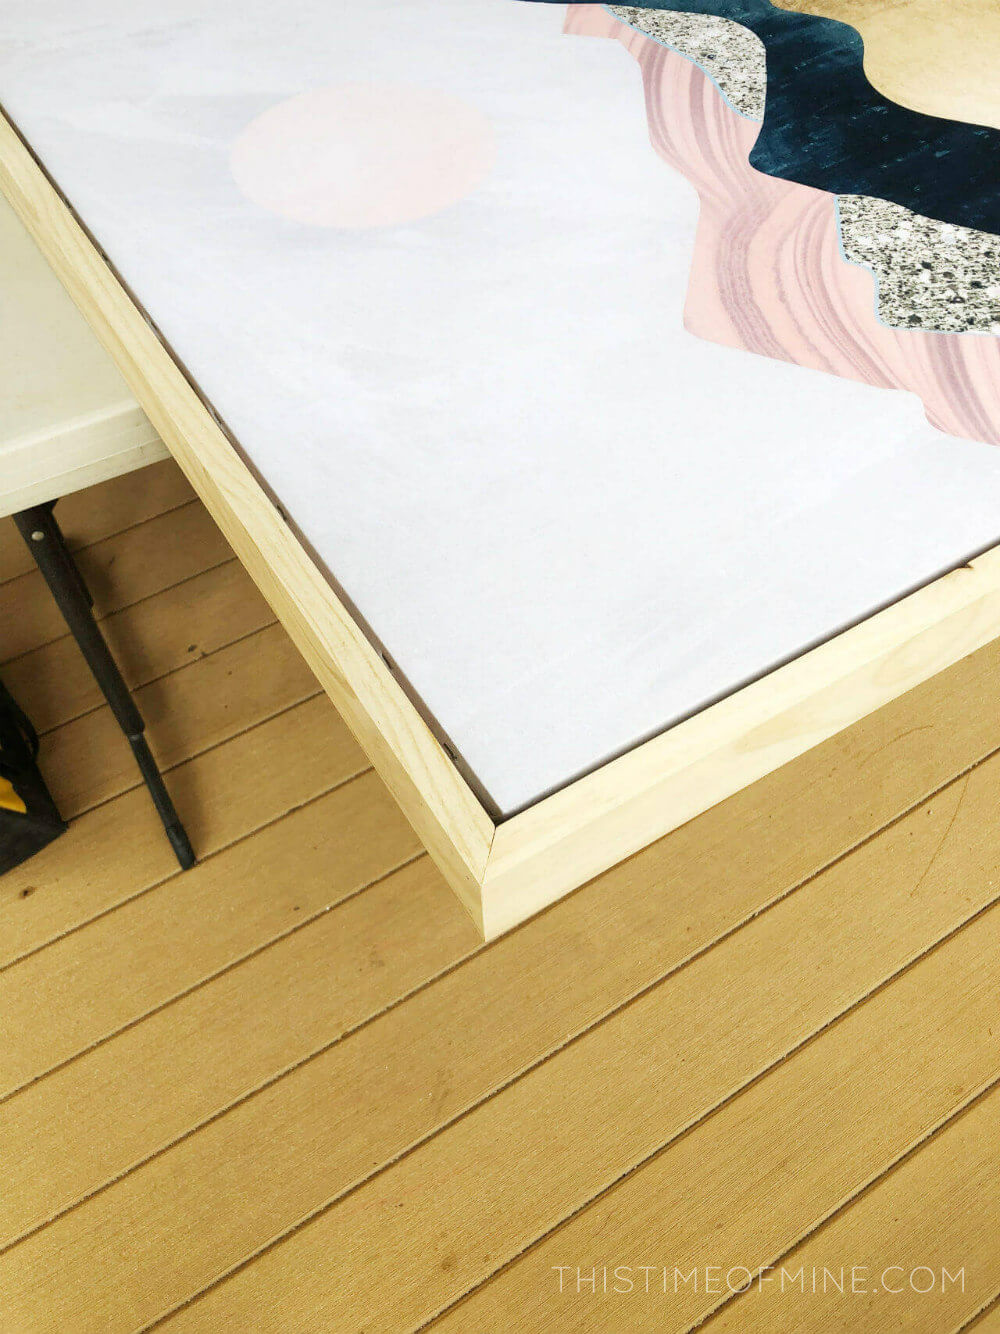
Prepare the original frame by making sure the staples are hammered down to make a flat surface. Also, trim any extra fabric so you have bare wood for your wood glue.
Working with one board at a time, place the 1×2’s on top of the inside frame, giving yourself a ¼ inch overhang.
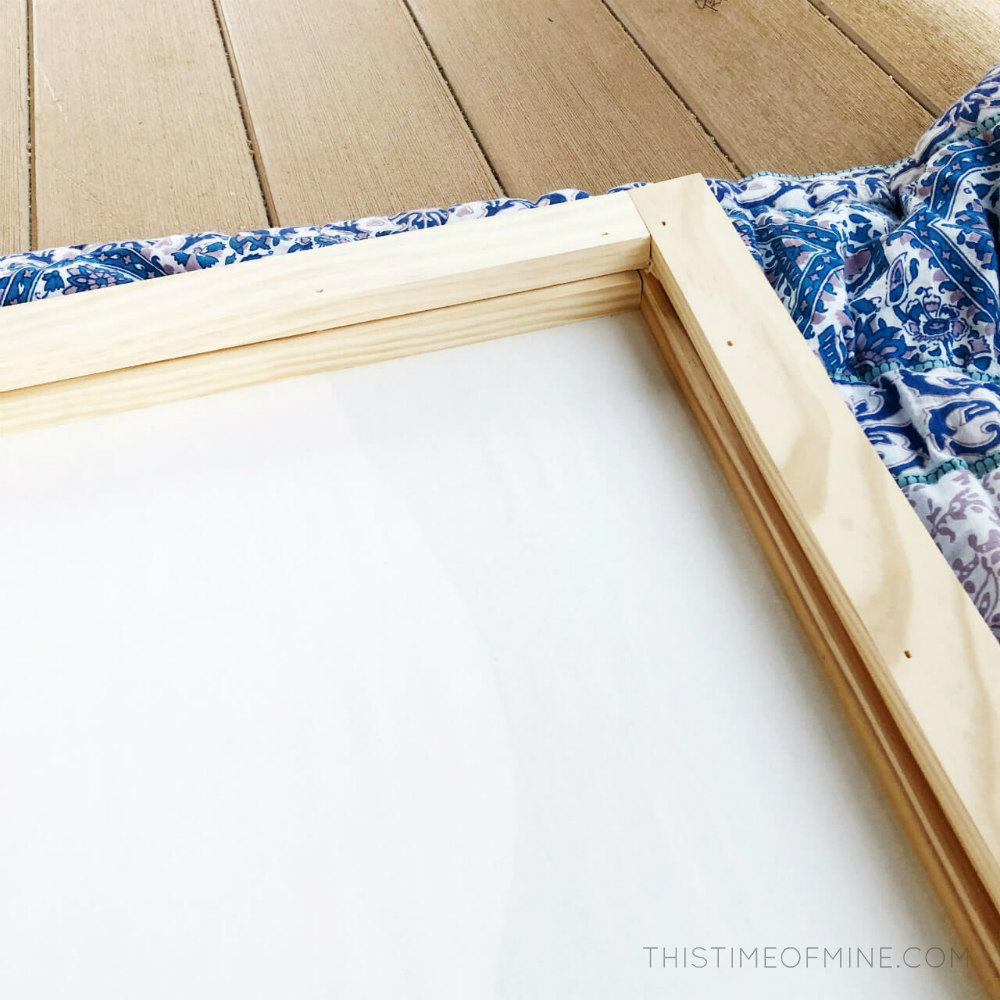
Use wood glue and your nail gun to secure each into place.
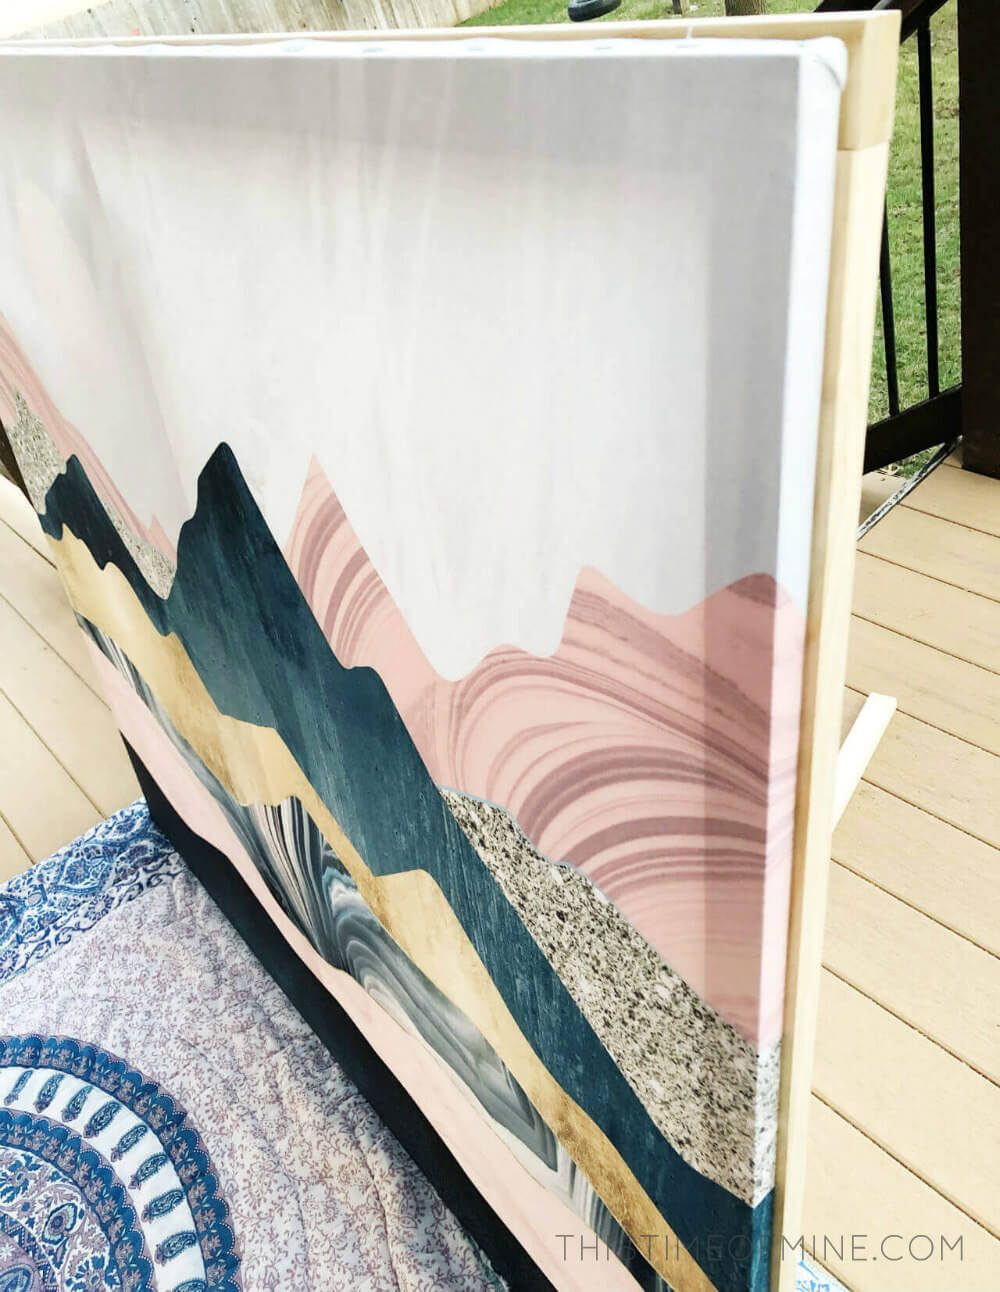
STEP 5: BUILD THE FLOATING FRAME
Now it’s time for the floating frame!
Sand and finish your 1×3 boards as desired. (I left mine raw and just lightly sanded the edges.)
Working with 1 board at a time, measure each 1×3 board and miter the edges at a 45-degree angle, paying attention to which direction each cut should go.
To secure each board, use wood glue along the whole board and some finishing nails in each corner. We placed our 1×3 boards a ¼ inch forward from the front of the canvas.
When your frame is assembled, use clamps to keep everything in place while it dries. (Just make sure you clamp from the very inside to the very outside so you don’t accidentally create gaps between any of the wood.)

* Wait about 24 hours before hanging.
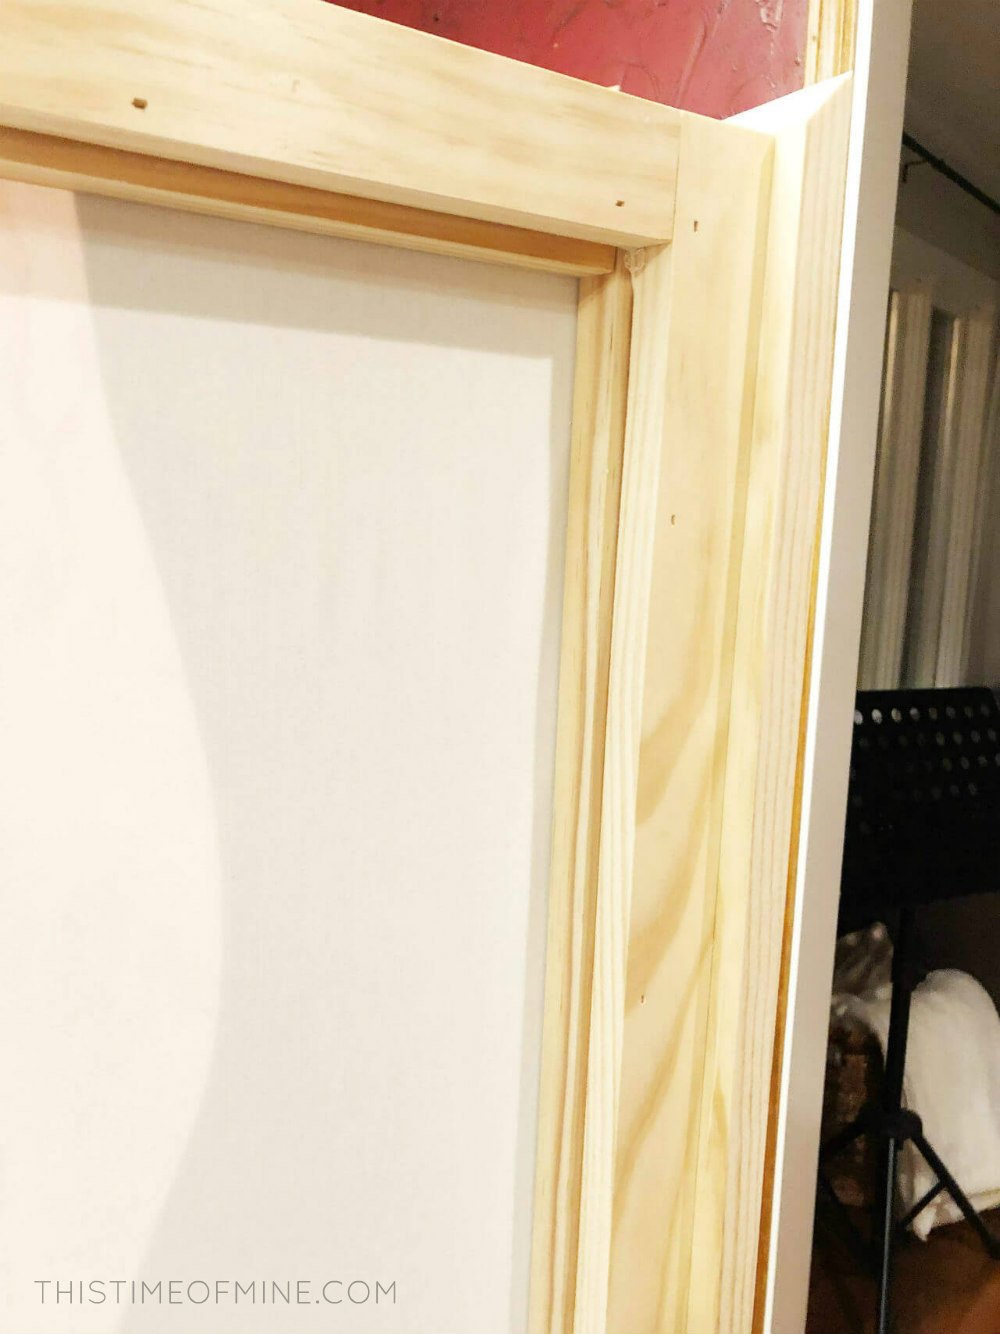
STEP 6: ADMIRE YOUR WORK
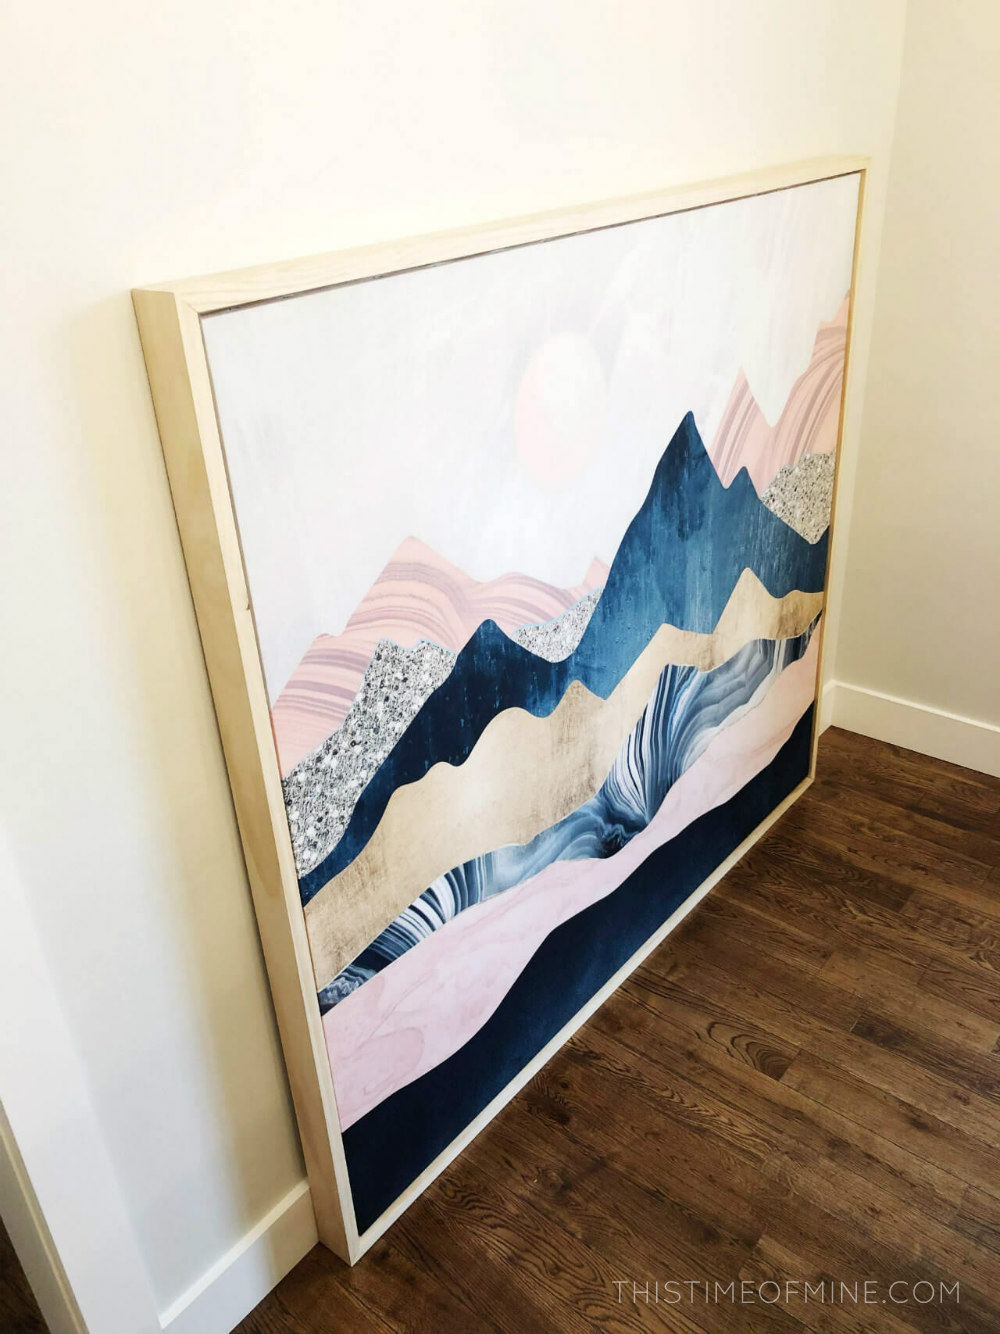
Congratulations, you did it! Now, step back and enjoy your handiwork!
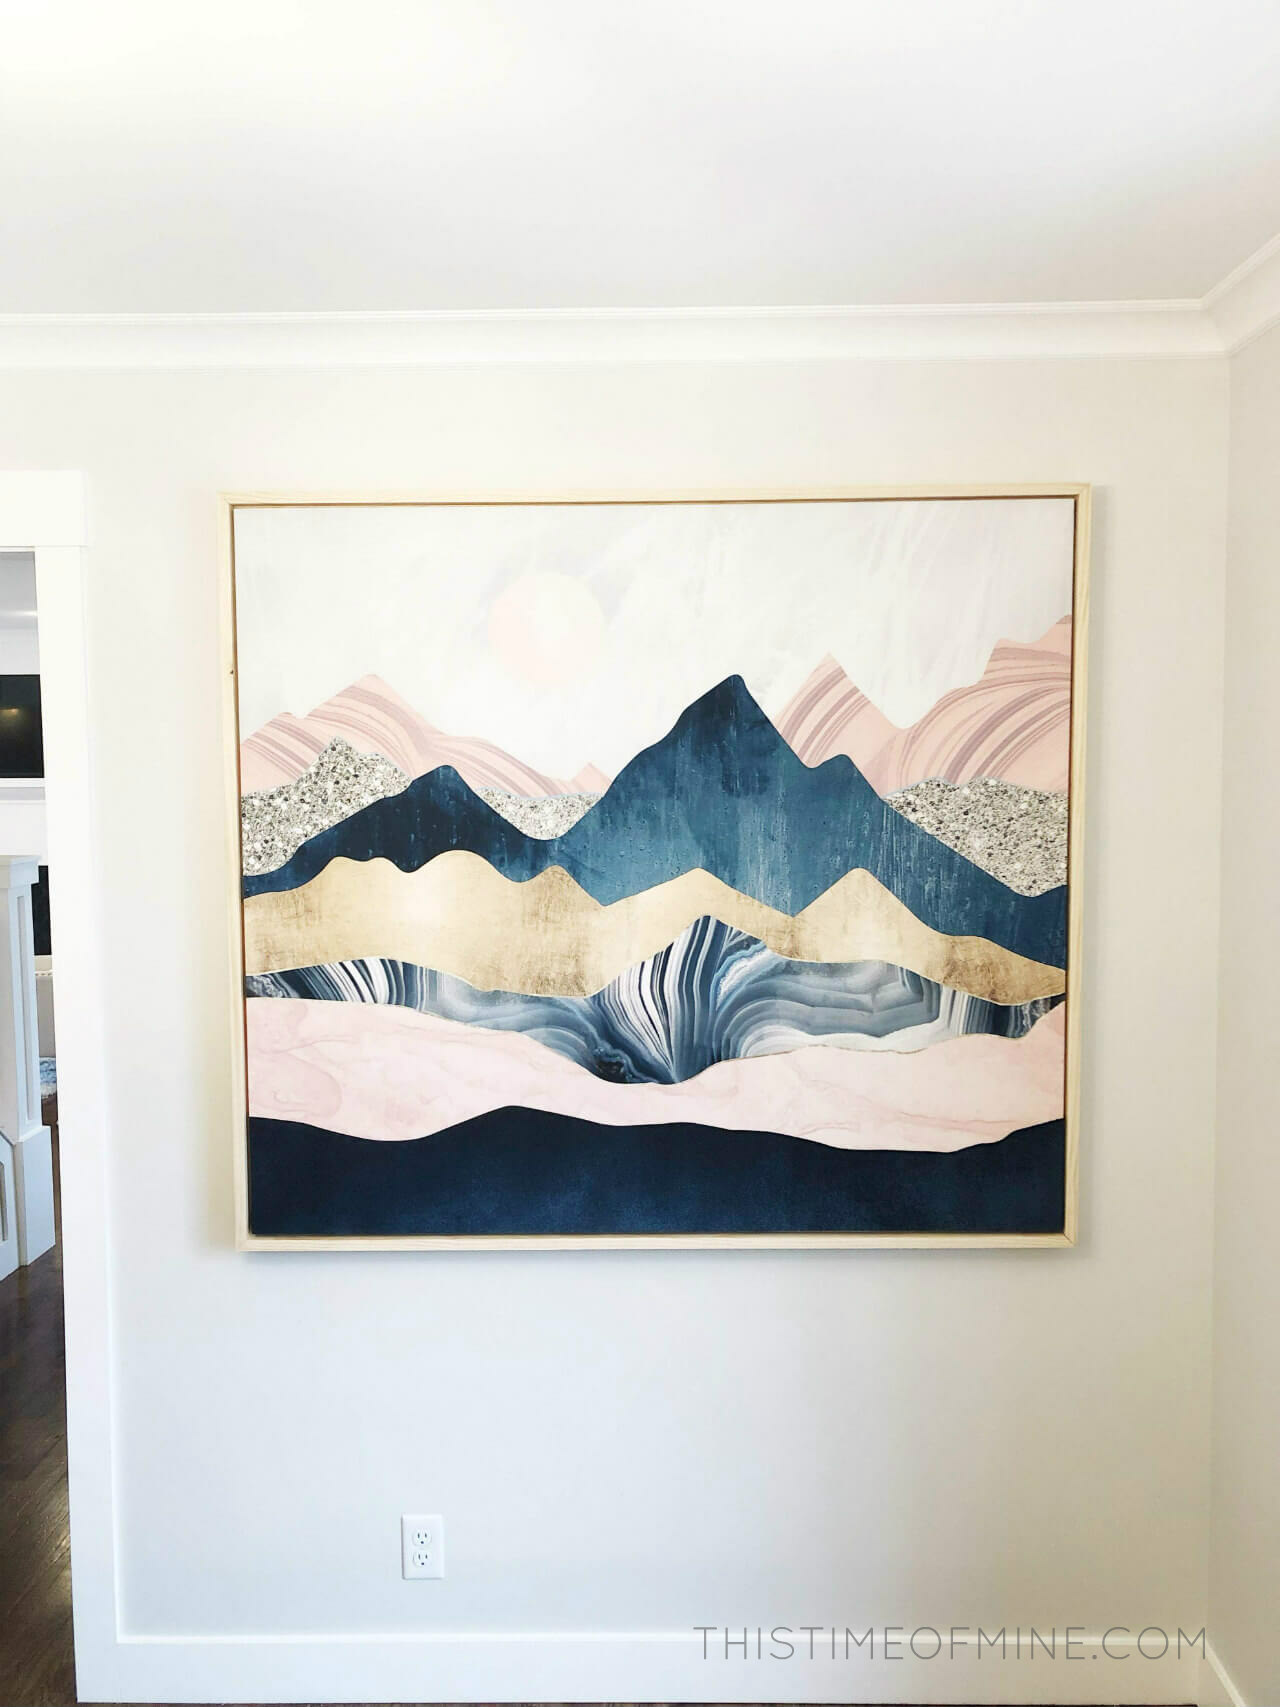
A piece of art this size could cost a small fortune, so thanks to Angela Rose Home for the idea. Follow her on Instagram for other fun and creative inspiration!
Did you try this tutorial? I’d love to hear how it went in the comments!
want to remember this?
PIN IT TO YOUR FAVORITE BOARD
Share this article:
I love this! Thank you! What is the name of the tapestry you used. I haven’t been able to find it on the website you provided.
This is exactly the tutorial I’ve been looking for. Thank you!!
I’m so glad it helped!
How long should we make the boards for the outside/floating frame?
Is the inside edge of the floating frame the same length as the middle frame?
Thanks
Make all 4 boards 1/2 inch longer. The entire outside frame will be slightly bigger than the inside. When you lay it on top of the original frame, adjust it until you get a 1/4 inch overhang. Hope that helps!