Daily Quiet Time – How To Use Roomtime With Your Toddler


Having a daily quiet time is a must with toddlers and preschoolers. Scroll through this post to find out how to transition from Independent Playtime to Roomtime so you and your child can enjoy its benefits!
When I was a brand new mom, I was introduced to the concept of Independent Playtime. And let me tell you…to this day, it’s been, hands down, one of the best bits of parenting advice I’ve ever received.
Playtime has been a regular part of our family for over 9 years now. I love that it works for all ages – from brand new babies to preschool and beyond.
Oh, and I just need to quickly insert here that it’s also a MUST HAVE for the sanity of mothers everywhere. I mean, a built-in break time every day? Yes, please!
I can do whatever I want during that time! Catch up on housework, fit in a workout, do a house project, sit on the couch and mindlessly stare at my phone…the options are endless!
Don’t get me wrong, I absolutely love being a mom and having my children around. But one thing that helps me stay that way is having some time to myself to get things done.
That’s one reason I’m such a stickler about naptime. But not all kids are nappers. And even the ones that are don’t nap forever.
That’s why I’m also a big stickler about Independent Playtime. Besides having some pretty amazing benefits, it continues to evolve and can stick around for years. Long after naptimes have faded away.
And that’s what we’ll be going over today – the 2nd phase of Independent Playtime, or Roomtime.
OVERVIEW
This is the 4th post in the Independent Playtime series – a series where you’ll learn all about Independent Playtime and how to use it.
- If you’d like a place to start, read Get to Know the Magic of Independent Playtime to learn what it is along with its main purpose.
- Or if you’re curious about why it’s so great, hop on over to 20 Amazing Benefits of Independent Playtime.
- And if you’d like some tips on making it work, check out How To Make Independent Playtime A Success, where you’ll also find a free printable with suggested playtime lengths.
Ok, now on to today’s post. Here you’ll learn all about when, where and how to do Roomtime. I’ve also included how I use it for my school-aged children. (Yes, you can even use it with older kids!)

This post contains affiliate links. For more information, see my disclosures here.
SO, WHAT IS ROOMTIME?
Roomtime, or “Quiet Time” as I’ll refer to it in this post, is similar to Independent Playtime in the fact that it’s structured solo playtime. The difference is mostly in the location.
Rather than being on a blanket or in a crib, your child is now old enough to play alone in a room. This provides more freedom, while still teaching boundaries.
Quiet Time is extremely helpful when preparing for transitions. It can be used when dropping naps. Or even when you bring home a new baby, allowing you to focus on the new baby while your older child plays quietly in another room.
It’s also helpful with social transitions.
I always noticed a difference in my toddlers when we did it before a playdate. And it almost always helped prevent late afternoon meltdowns when we did it after a busy day out.
It even helped on days where my toddler or preschooler seemed extra whiney or prone to tantrums. Things usually calmed down after Quiet Time. (Along with some extra hugs and attention from me.)
WHEN DO I MAKE THE SWITCH TO QUIET TIME?
With my boys, I knew it was time to switch when they started climbing out of their crib. I figured: if they were climbing out of their crib when they should be sleeping, what would keep them in it during playtime?
My girls were a little more easy-going. They never climbed out of their cribs and I don’t think they cared either way.
Essentially, you know your child best. If you feel like they’re starting to play better on the floor and they’re standing and walking around, it might be worth a try.
A common age to switch is around the time your child can walk. Another common time is between 18-24 months.
HOW LONG SHOULD QUIET TIME BE?
Around this age, your child can handle anywhere from 30-90 minutes playing alone. She can even go up to 2 hours around the time she’s in preschool, especially when she starts dropping the afternoon nap.
If your child hasn’t done Independent Playtime before, or is having a difficult time switching to Quiet Time, you can start small. Try 5 minutes. She might cry the entire time. But each time you do it, she’ll get better and you can start to go longer.
Note: Sometimes starting with longer chunks, 10-15 minutes might be more successful. Often 5 minutes isn’t long enough to settle into anything, and short enough that she knows she can keep crying until you come back. Start to stretch the time as soon as you can.
If you’d like a guideline for all things playtime, read this post: How To Make Independent Playtime A Success. There you’ll find all the suggested lengths and locations for each age.
SETTING THE STAGE: CHOOSE A GOOD LOCATION
When your child is younger and doing Independent Playtime, the location is easier to choose since it’s usually in a crib or pack ‘n play. But when he’s ready to transition, you need to be mindful about where it’ll be.
Quiet Time is different than free play. At any other time of the day, you can allow him to run off and play alone for awhile. But during this time, he needs to be led to a designated location like his room or a playroom.
And it’s ok if you don’t have space for a separate playroom, or if his room is being shared by a sleeping sibling. Try finding a place in your house you can section off with a baby gate.
One of the goals of Quiet Time is to teach boundaries. So wherever you choose, it just needs to be a place you can close off.
I personally loved having a door to close. My kids all played better when they couldn’t see me. It also helped keep the routine consistent if I ever had to change rooms.
By the time they were in preschool, I never closed the door all the way. I just kept it mostly shut.
SAFETY IS IMPORTANT
Take the time to babyproof the room to your liking. I actually never went all-out with babyproofing. (Don’t tell.) But I did make sure outlets were covered, medicines were put away and chords and such were out of reach or out of sight.
Yes, sometimes, the room ended up a total disaster…think toys, clothes and baby wipes all over the floor. But my kids usually grew out of that. Read this post for some tips on dealing with the playtime messes.
And since I’ve usually been able to do Quiet Time in my children’s rooms, I know it’s already mostly safe and isn’t stocked with things like marbles and tiny legos. But I still keep a listening ear (or a baby monitor if I’m farther away or more heavily occupied).
HOW TO DO QUIET TIME
When it’s time for playtime, lead your child to the designated area and help her pick out a few toys. Give her a kiss and wish her a fun playtime…and then walk away.
Note: This may take time and practice. Don’t be deterred by tears. This is a skill you are teaching and its benefits make the transition worth it!
Now, that’s just the basic overview. But I want Quiet Time to be as successful as it can be for you. So since I love tips and lists, here are 5 ways to make it even better:
1. BUILD IT UP
Although there might be some tears at first, Quiet Time should turn into something both you and your child enjoy. He’ll feed off of your energy, so build it up to be fun! Teach him that it’s a fun part of his routine, not just a time for him to be isolated and alone.
Tell him, “Ok, it’s time for playtime!” and help him get excited about it. Let him have fun helping you pick out a few toys. And stay positive as you leave, whether there are tears or not.
Remember, you can start small and slowly increase your time.
2. PICK THE RIGHT TOYS
One of the goals of Quiet Time (or Roomtime) comes from the book On Becoming Preschool Wise: “The most important aspect of this time is that your child is learning to focus on what he can do with the things he has.”
So although you can definitely let your child help you pick out some toys, you should still have a say in what he plays with. Over time, you can let it become more of a free-for-all, but do stay involved in the toy choice for awhile. Just keep in mind that less is more.
Make sure he has access to toys that are developmentally appropriate. You don’t want him to become frustrated with toys that are too difficult or bored with toys that are too easy. And don’t forget to rotate them out occasionally.
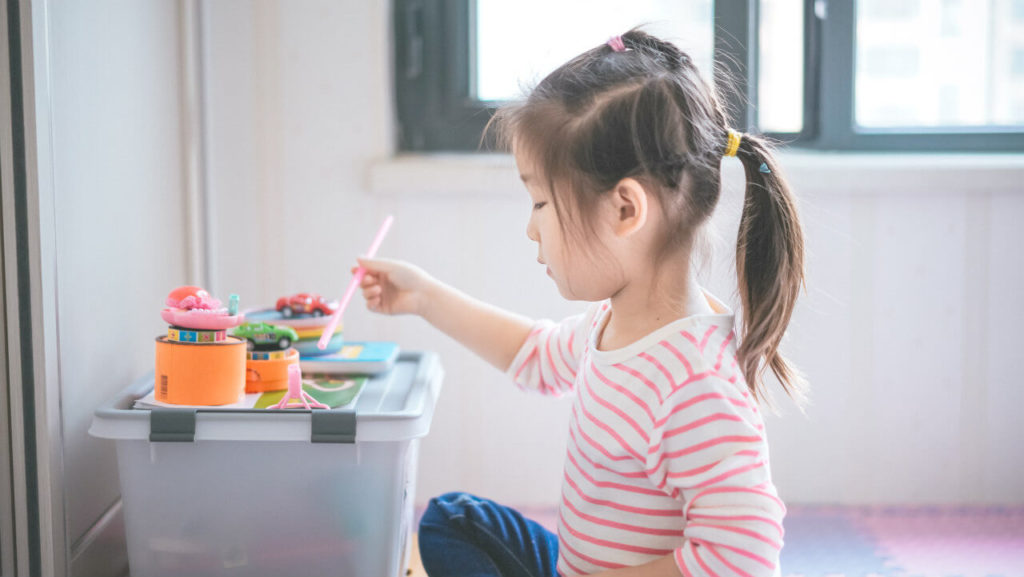
Also, if Quiet Time can’t be done in the area that usually has toys, that’s ok! You can have a playtime bucket that he helps you load and take to his spot.
Side note: Quiet Time isn’t a time for electronics (TV, iPads, etc.). Save that for later.
3. USE A TIMER
Set a timer for playtime. And let your child know you’ll be back when the timer goes off. This will help ease her little mind about you leaving.
It’s up to you whether you leave the timer in the room or not, but I found it helpful to keep it with me. I wanted my kids to enjoy playtime and not be focused on how much longer they had.
4. END WITH PRAISE
Always end with lots of praise. Keep Quiet Time a positive part of your day. Praise him for playing well. Praise him for staying in playtime. Praise! Praise! Praise!
5. CLEAN UP
Make sure your child helps you clean up. Sing a song or do whatever makes it fun. Teach her that cleaning up after ourselves is just something we do.
QUIET TIME AND OLDER CHILDREN
I still use the concept of Quiet Time with my older children, although it’s not nearly as structured.
We don’t get around to it much during the school year, but I always make it a part of our summer routine. They get to choose where they go and what they do, but it’s still alone time.
This always helps when my kids start getting on each other’s nerves or just need a break. They can read, play with play-do, draw, or do anything they want. As long as it’s quiet and they have some time alone.
And we’re all the better for it.
CONCLUSION
Ok! That was a lot of information, and thanks for sticking it out! But I hope you’re willing to give Quiet Time a shot if you’re not using it already.
Remember, it might require a little learning curve at first, especially on your child’s part. But once you get it down, both you and your child will benefit immensely from it.
Have patience, stay consistent and stick it out. And before you know it, it’ll become a favorite in your daily routine too!
Check the other posts in this series for more helpful information:
- Get to Know the Magic of Independent Playtime
- 20 Amazing Benefits of Independent Playtime.
- How To Make Independent Playtime A Success
- Independent Playtime: When It’s Just Not Working
- How To Reign In The Playtime Mess
How do you encourage your children to play alone? I’d love to hear your tips and success stories in the comments!
want to remember this?
PIN IT TO YOUR FAVORITE BOARD
Share this article: